

How To Set Up A Fish Tank Canister Filter
Canister filters are great, aren't they? Powerful, pressurized water filtration that gets your water crystal clear and near-limitless possibilities for customizing the filter media that you use can't be beaten, right? I'thousand inclined to concur, but there are some other thing canister filter owners can mostly concord on as well: the instructions that come packaged with filters tin at times exist terrible, and setup is often the hardest part, especially for beginners.
How are you supposed to become your filter working correctly without instructions? Are you up to date on aquarium prep? How to prepare up canister filter media? Where to position your filter? Do yous know how to cutting your hoses, or attach them to your canister and run them to your tank? It's an involved process, and it's like shooting fish in a barrel to miss a footstep. Thankfully, the internet (and yours truly) are hither to show yous how to set up a canister filter.
What You Need To Get Started
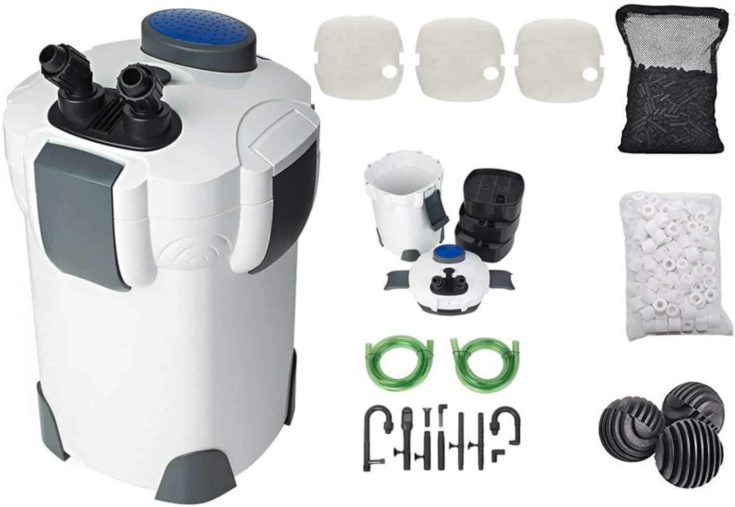
It should go without saying, but you'll need your filter, information technology'south components, and all your media to get started. The exact components that come with your particular filter may vary, but in general, y'all'll accept the following:
- Hoses
- A Motor
- Tank Connectors
- Hose Clamps
- Hose Clips
- Intake Assembly
- Output Assembly
- Filter Canister
- Media Trays or Baskets
- Media Bags
- Foam Inserts
- Ceramic Rings
- Activated Carbon
Generic Hosing
The standard hosing can sometimes exist potent and hard to handle. You want your tubing thick, but information technology should still be pliable and costless of any kinks. Instead of ordering branded replacement tubing for the filter, I like to get with a gyre of generic vinyl hose tubing that tin be cut to the length you need. Information technology's less expensive, normally less hassle than working with the tubing that comes with your filter, and you lot'll accept plenty of actress on manus only in case of an emergency.
Bio-Balls
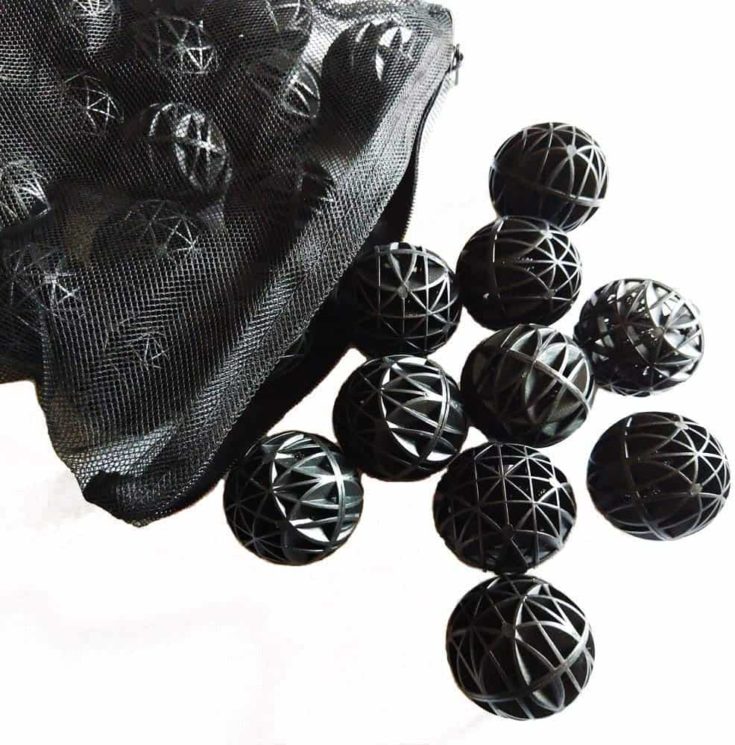
Depending on your filter, it may come pre-packaged with ceramic rings equally its primary biological filtration media. Some folks prefer bio-balls, still, as they degrade much slower.
Phosphate Removers
Activated carbon is a popular media for chemical filtration, but I prefer adding a bit of phosphate remover also to aid control algae growth in my aquarium.
Extra Cream
Your filter might accept come with one type of foam padding for mechanical filtration, just to optimize your results, you demand to have a combination of coarse cream, fine foam, and extra-fine foam.
Instructions
1. Identify Your Parts
Unpack everything, get your filter's part listing, check that everything that should be there, is there. Your filter should come up with everything that y'all need to start pumping. If your filter came bundled with media, you lot'd want to bank check those to ensure they are not damaged, and suitable for utilise in your filter.
2. Prep Your Tank
Notice a proficient spot for your filter to balance. Remember that your filter should exist below your aquarium for optimal use. The platonic positioning of nigh filters falls between 8 inches and iv ½ feet below your tank's water level. Bank check your filter'southward guide to find yours. You'll also want to make certain that your aquarium is filled to its maximum level, and that your hosing tin follow a directly path to your tank. Y'all don't want any loops, slack, or kinks in your tubing, and so test your tubing before setup to make sure it can achieve the tank with no problems.
iii. Prep Your Filter
Now we outset the process of getting our media ready for the filter. Remove your filter's motor head, and brand certain that all of your media baskets are inside. Depending on your filter you may have 3 or 4 baskets to fill. Gather your preferred media, sort them out by type, and get ready to install them layer past layer. If you have any gap in the bottom of your filter when the baskets are inserted, consider lining the bottom with some old ceramic rings to diffuse any waste that will collect downwards there.
iv. Install Mechanical Media
Your mechanical media should be placed in the beginning tray of your filter. Why? Subsequently your filter draws water from the tank, it then flows from the first tray of the filter and then is forced to the other layers, condign cleaner with each step. Mechanical filtration should be the first step in this process, so that when water gets to the biological and chemical stages, the filter media in that location won't go chock-full with waste and debris. Take your iii cream varieties: coarse, fine, and actress fine, and stack them in the tray from lesser to top in that social club. Each layer will filter out smaller and smaller particles, preparing it for the side by side phase in the process.
v. Install Biological Media
Yous should add your preferred biological media to the second tray from the lesser. Every bit mentioned, some tank owners like the ceramic rings, others prefer the bio-assurance. Others however favor using something known as Biohome for all of their filtration needs, and skip out on mixing media altogether. You may elect to store your biological media in filter numberless but in that location are plenty of tank owners who just line their trays with the biological media, to no ill effect.
6. Install Chemical Media
Your 3rd and fourth trays (if y'all accept a fourth tray) are gratuitous for yous to mix things up. You're complimentary to use them for more of the same media if that's what you feel most comfy with. You lot could also experiment, and try calculation some chemical media to the mix. Activated carbon is a pop choice, as are phosphate removers like PhosBan. These media frequently come as loose granules, so if you do choose to add together them, using a filter bag is very important (exterior of the purse, the granules can kickoff to drift, and potentially clog your filter's impeller).
7. Prepare Intake
Now we can get our intake, the role of the filter that draws water from the tank, prepared. Some filters have a connector that attaches to the tank holding the hoses in place. Fasten the connector to the tank. And then attach your hose to the filter by loosening the intake clench, attaching the hose to the intake valve, then tightening the clamp up again.
Run your hosing to the tank, cut your hose to length (no slack, no loops), then secure your hosing to the connector. The terminate of the hose should fasten to an intake tube that lowers into the tank water. If your manual doesn't have a recommendation on how far the tube should extend into the h2o, fall back on the 3-inch rule, which advises to keep the end of the tube at least 3 inches from the lesser of your tank.
8. Prepare Output
This will be done in much the same fashion as our intake preparation. Set the tank connector, attach your hose to the filter, measure & cutting, then ship your hose to the tank. In this case, still, our output nozzle should remainder at to the lowest degree an inch under the water line, it doesn't have to pb all the way to the bottom of the tank.
9. Showtime Your Filter
This can vary from filter to filter. In general, yet, you will want to cheque that everything is connected securely, and in the proper place. Make sure that your valves are open so that the filter tin draw and then expel water from your tank. Some filters will require that you have water in the canister to brainstorm, so ensure the necessary amount is in the chamber earlier starting. When you are satisfied that everything is ready, plug in your filter.
If it has an auto-prime characteristic, the filter will run for a bit to get the water flowing, then turn off to force backlog amounts of air from the canister, it volition then run continuously until you turn it off. If you have a priming push for your filter, you may demand to pump that a few times to become information technology going.
10. Watch Your Tank Go Cleaner
Observe your filter in action for a while, and make sure everything's running smoothly. Some filters might make some rattling noises during showtime up. If these noises persist, all the same, yous might want to check to make sure no debris is clogging any of the filter components. Spotter your menstruation rate. If information technology seems to be lower than expected, you may have to tighten your hose connections, or remove obstructions from your tubing.
Conclusion
Wasn't that fun? Hopefully you're now a scrap more than clued in on how to gear up up your canister filter, and some basic operational procedures. As I mentioned, the instructions that come up with a lot of filters aren't always the clearest or easiest to follow, so it'due south helpful to have a footstep-by-stride guide that can break out some of the difficult-to-decipher linguistic communication into easier terms.
What do you think? Were these steps helpful in breaking down the filter setup process? Any extra steps or tips you retrieve should be included? Let me know your thoughts in the comments, and remember to share the article if you found information technology useful!

How To Set Up A Fish Tank Canister Filter,
Source: https://www.tankarium.com/how-to-setup-canister-filter/
Posted by: maldonadolabitchisiol.blogspot.com
0 Response to "How To Set Up A Fish Tank Canister Filter"
Post a Comment